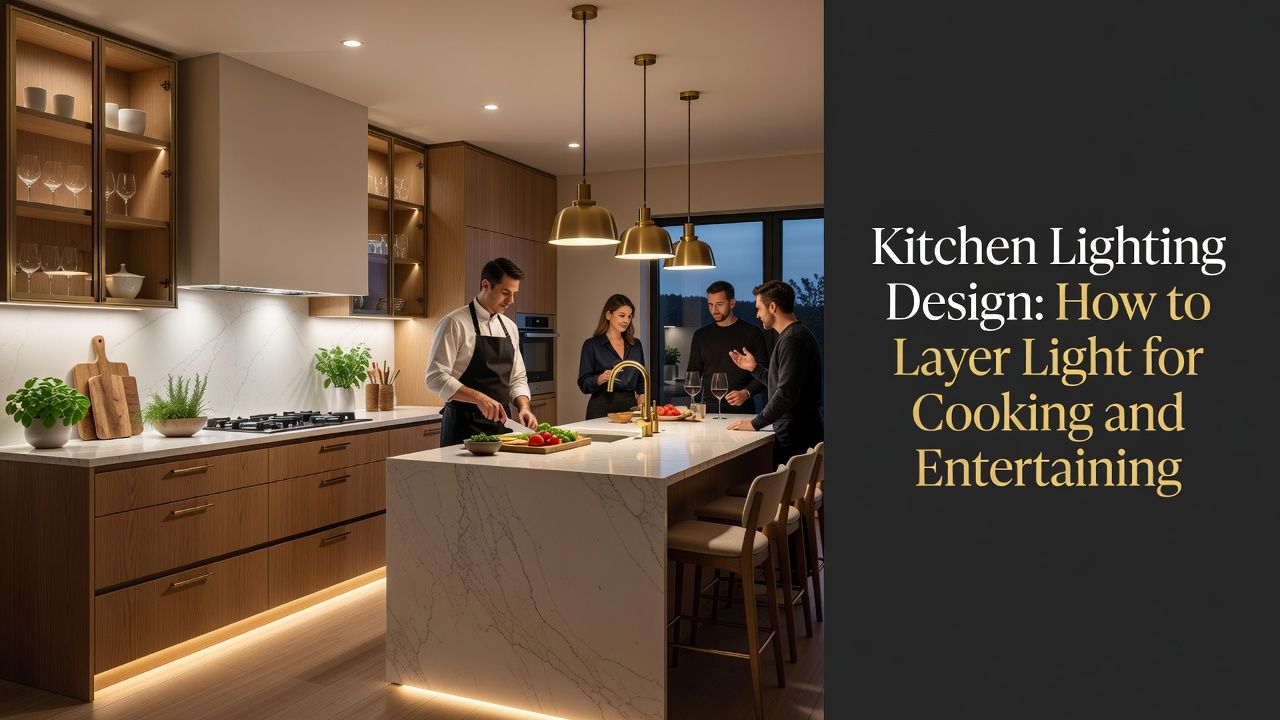
Kitchen Renovation & Home Improvement
A single ceiling fixture is the most common lighting mistake in home kitchens, and it’s rarely about the fixture — it’s about having only one.
Stand at a typical home kitchen counter and cut something on a board, and there’s a decent chance you’re working in your own shadow. A single central ceiling fixture — whether a flush-mount light or a scattering of recessed cans placed without much specific plan — illuminates the room generally while leaving the actual work surfaces, where a person standing at the counter blocks the overhead light from above, in comparative shadow. This is the single most common lighting failure in home kitchens, and it isn’t really a fixture-quality problem. It’s a planning problem: most kitchens are lit as a room rather than lit as a workspace, and those are genuinely different design problems with different solutions, even though they’re often solved, or rather not solved, by the exact same electrician working from the exact same generic instinct.
Professional lighting designers, and the standards published by bodies like the Illuminating Engineering Society, approach kitchen lighting through a layering framework: task lighting for the specific work of cooking and prep, ambient lighting for general room illumination, and accent lighting for visual interest and mood. A well-lit kitchen uses all three, working together and independently controllable, rather than relying on one central source to do every job at once. This guide walks through each layer, how to place and control it, how natural light interacts with the plan, and how to adapt the whole framework for a full renovation versus a lower-cost retrofit that doesn’t touch a single wall.
01Task lighting: solving the shadow problem
Task lighting is light aimed specifically at where work happens — the counter where you chop, the stove where you watch a sauce, the sink where you inspect whether a pan is actually clean — and it’s the layer most home kitchens skip entirely, relying on general ceiling light to do this job by default and doing it poorly as a result. The single highest-value task-lighting addition to almost any kitchen is under-cabinet lighting: a continuous or near-continuous strip of light fixed to the underside of the upper cabinets, illuminating the counter directly below without any part of your body coming between the light source and the work surface, since the light is already below shoulder height and pointed straight down at exactly the spot where you’re actually working.
LED strip lighting has made this dramatically more affordable and easier to retrofit than it used to be; a reasonably capable adhesive LED strip, plugged into a nearby outlet or wired to a switch, can be installed under existing cabinets in an afternoon without any renovation at all, which makes it one of the best-value lighting upgrades available to a renter or anyone not planning a full remodel any time soon. For a full renovation, hardwired under-cabinet fixtures with a dedicated switch or dimmer offer a cleaner look, no visible cord snaking along the wall, and typically better light quality and dimming behavior than adhesive strips, and they’re worth specifying if the budget allows for the small additional electrical work involved.
Beyond the main counters, task lighting should extend to every place real work happens in the kitchen. Over the stove, a range hood with an integrated light handles this in most kitchens, but it’s worth checking that the hood’s light is bright enough and properly positioned rather than assuming any hood light is adequate — some are genuinely too dim for close visual work like judging a sauce’s reduction or checking whether something is properly browned. Over the sink, a single recessed can or a small pendant positioned directly above, not several feet to one side, which is a common installation error that leaves the sink itself shadowed just when you need to see into it most clearly, makes a real difference for the close visual work of washing delicate items or checking dishes are actually clean rather than just rinsed. Over an island, pendant lighting does double duty as both task light for whatever prep happens there and a strong visual anchor for the whole room, discussed further below in more detail.
| Work zone | Best task-light solution | Common mistake |
|---|---|---|
| Main counter / prep | Continuous under-cabinet LED strip | Relying on ceiling light alone — casts shadow |
| Stovetop | Bright, properly positioned hood light | Assuming any hood light is bright enough |
| Sink | Recessed can or pendant directly overhead | Light positioned to the side, shadowing the basin |
| Island | Pendants sized and hung correctly for the surface | Pendants too small, too high, or too few |
| Pantry / cabinet interiors | Motion-activated LED puck lights | No light at all in deep or dark storage |
02Ambient lighting: the layer that sets the room’s mood
Ambient lighting is the general, overall illumination of the room — what makes the space feel bright or dim, warm or cold, functional or moody — and it’s usually delivered through recessed ceiling cans, a central fixture, or both working in combination. The most common design failure here isn’t insufficient brightness; it’s insufficient control over that brightness. A kitchen that’s lit to full brightness for cooking safety at 6pm and is still lit to the exact same brightness for a relaxed dinner conversation at 9pm is a kitchen where the ambient layer isn’t actually doing its job, because a functional workspace and a pleasant space to linger in genuinely want different light levels, and a kitchen needs to be both at different times of the same evening.
Dimmer switches on the ambient layer are one of the highest-value, lowest-cost additions available in a kitchen lighting plan, and they’re worth specifying even on a tight budget, since the cost difference between a standard switch and a dimmer is minor relative to almost any other line item in a renovation, and the daily benefit is felt every single evening for as long as you live in the house. If recessed cans are being installed as part of a larger project, spacing them for even, shadow-minimizing coverage across the whole room, rather than clustering them in the center and leaving the perimeter comparatively dim, makes a noticeable difference, and a lighting designer or knowledgeable electrician can calculate appropriate spacing based on ceiling height and fixture beam angle rather than simply guessing at even intervals.
Color temperature deserves specific attention in the ambient layer, because it affects both how food looks and how the room feels, and it’s a spec that’s easy to get wrong by defaulting to whatever the hardware store happens to stock that week. Warmer light, typically labeled somewhere around 2700–3000K, tends to feel cozier and flatters skin tones and warm-toned food, while cooler light at 3500K and above reads as more energetic and can make some foods look less appetizing under close inspection, an effect worth being aware of if you’re specifically choosing bulbs for a kitchen rather than for a bathroom or a garage where the same considerations don’t apply. Consistency matters as much as the specific choice: mixing noticeably different color temperatures within the same room, especially between the ambient and task layers, produces a visually uncomfortable, mismatched effect that’s a common and entirely avoidable mistake when fixtures are bought piecemeal over time rather than specified together as part of one coherent plan.
One switch does not a lighting plan make
If your entire kitchen turns on and off from a single switch, you don’t have layered lighting — you have one light source pretending to do three jobs. Even a modest renovation budget should separate at least task (under-cabinet), ambient (ceiling), and any island pendants onto independent switches or dimmers, so each layer can be adjusted for the moment rather than locked to a single setting all day.
03Accent lighting: the layer that makes it feel intentional
Accent lighting is the smallest layer in terms of raw light output and the largest in terms of how “designed” a finished kitchen feels, because it’s purely about visual interest rather than function — illuminating open shelving to show off dishware, lighting the interior of glass-front cabinets, running a subtle strip along the toe-kick at floor level, or highlighting a piece of art or a backsplash detail that would otherwise disappear at night once the ambient light dims down for the evening. None of it is necessary for a kitchen to function, which is exactly why it’s the layer most frequently cut in a tight budget, and also why its absence is part of what makes an otherwise well-built kitchen feel slightly flat or unfinished compared to one that included it, even when the difference is hard to articulate precisely.
Pendant lighting over an island sits at the boundary between task and accent lighting and deserves particular attention because it’s frequently mis-specified in both directions by people who underestimate how much these decisions matter to the final result. Pendants too small for the island they’re hung over look visually lost and provide inadequate task light for whatever work happens beneath them; pendants hung too high lose both their visual impact and their functional lighting value, since the light spreads too widely by the time it reaches the counter to provide meaningful task illumination for close work like chopping or reading a recipe. A reasonable starting guideline is hanging the bottom of the pendant somewhere in the range of 75 to 90 cm above the counter surface, adjusted for the specific fixture’s light output and the room’s overall ceiling height, and spacing multiple pendants evenly along the island’s length rather than clustering them in the middle and leaving the ends comparatively dark. This is a case where seeing the fixture actually hung at the proposed height, even temporarily with a string and a piece of cardboard as a stand-in, before committing to the electrical rough-in is worth the extra step, since photographs and showroom displays rarely convey the real proportions accurately once the fixture is in your own specific room.
04Natural light: the layer you plan around, not for
Natural light deserves a place in the planning conversation even though it isn’t something you’re installing, because a lighting plan that ignores how daylight actually moves through the kitchen at different times of day will underperform regardless of how well the artificial layers are designed on paper. A kitchen with a large west-facing window gets strong, warm, often glare-heavy light in the late afternoon and comparatively little in the morning; a north-facing kitchen gets more even but generally dimmer light throughout the day, which changes what the artificial layers need to compensate for at different hours. Walk the space at different times, if you genuinely can before finalizing fixture placement and switching, and consider window treatments that can moderate strong afternoon glare without eliminating the natural light entirely, since a kitchen that’s pleasant to cook in during the day and needs a completely different artificial lighting strategy at night is not unusual, and the switching plan should accommodate that real shift rather than assuming one setting suits all hours of the day equally well.
05Controls: what actually makes a layered plan usable
A well-designed set of three lighting layers is only as good as the switching plan that controls it, and this is where a lot of otherwise good lighting designs fall short in actual daily practice. Each layer should be independently switchable at minimum, and dimmable where the fixture type supports it, since not all LED fixtures dim smoothly with all dimmer types, so it’s worth confirming compatibility between the specific bulbs or fixtures and the dimmer switch being installed, rather than assuming any dimmer works with any LED product off the shelf. Smart lighting controls have become genuinely useful and reasonably affordable for kitchens specifically, since being able to set and recall specific combinations — full brightness for active cooking, a dimmed and warmer combination for entertaining, a single soft light for a late-night glass of water — without manually adjusting several switches each time is a real, daily-use convenience rather than a gimmick, though it’s entirely optional, and a well-labeled bank of conventional dimmer switches accomplishes the same functional goal at considerably lower cost and complexity for anyone who’d rather skip the smart-home layer entirely.
If you’re planning switches during a renovation, think through the actual sequence of use: a switch by the entrance for ambient light makes sense for walking into the room and getting a general sense of the space, while task lighting switches are more useful positioned near where the task actually happens, close to the counter or the sink rather than across the room by the main door. It’s worth walking through your kitchen mentally, task by task, and asking where you’d naturally want each switch to be, rather than defaulting to a single bank of switches by the main door simply because that’s the conventional placement everyone else uses without thinking much about it.
06Retrofitting on a budget, versus planning a full renovation
Not everyone reading a lighting guide is mid-renovation with an electrician already on-site, and the good news is that a meaningful improvement in kitchen lighting is achievable without opening a single wall or spending anywhere near renovation-level money. Adhesive LED under-cabinet strips, discussed above, are the highest-value low-cost retrofit and can be installed by most people in an afternoon with basic tools and no electrical expertise required. Swapping existing bulbs for a consistent color temperature across all current fixtures is free or nearly free and immediately reduces the mismatched, uncomfortable look of a kitchen lit by whatever bulbs happened to be on sale at different points over the years. Adding a plug-in dimmer or smart bulb with app-based dimming to an existing fixture provides some of the benefit of a hardwired dimmer without needing an electrician at all. And a well-chosen pendant or two, if your kitchen has an island or peninsula with any existing overhead junction box already in place, can often be swapped in without significant electrical work beyond what a confident DIYer or a quick visit from an electrician can handle in an hour or two.
For a full renovation, the recommended approach is to bring in a lighting plan — whether from a dedicated lighting designer, a kitchen designer familiar with layered lighting principles, or a knowledgeable electrician — before the electrical rough-in stage, since retrofitting additional switches, circuits, or fixture locations after walls are closed is dramatically more expensive and disruptive than planning them in from the very start of the project. This is a case where a modest upfront design investment protects a much larger downstream budget, similar in logic to the infrastructure-first principle that applies to kitchen renovation budgeting generally and covered in more depth elsewhere.
07Energy efficiency and long-term cost
Energy efficiency is worth a further, deliberate section, not just a passing mention, since it affects both the ongoing running cost and the environmental footprint of whatever lighting plan you ultimately choose. LED fixtures and bulbs use a fraction of the energy of older incandescent or halogen options while typically lasting many times longer before needing replacement, and current guidance on efficient lighting choices, including specific product recommendations and their typical energy savings, is maintained by the ENERGY STAR program. For a kitchen, where lighting is often used for many hours daily across multiple fixtures simultaneously, the efficiency difference compounds into a genuinely meaningful saving over the lifetime of the installation, on top of the separate environmental benefit of lower overall electricity demand.
There’s also a maintenance-cost dimension worth mentioning: LED fixtures rated for tens of thousands of hours of use mean far fewer bulb changes over the life of a kitchen than the older technologies they’ve largely replaced, which matters disproportionately for hard-to-reach fixtures like high ceiling cans, where a bulb change genuinely requires a ladder and some inconvenience rather than a quick reach from a step stool. Specifying good-quality, long-rated LED fixtures at the outset of a renovation is a small upfront cost that pays back in reduced hassle for years afterward, quite apart from the electricity savings themselves.
The overarching principle to carry away from all of this: a kitchen is not one room needing one light level, it’s several different activities — focused prep work, safe cooking, casual conversation, evening entertaining — happening in the same physical space at different times of day, and each of those activities genuinely wants a different lighting solution suited to what’s actually happening in the room at that moment. Plan for the layers separately, control them independently, and pay particular attention to the under-cabinet task lighting that so many kitchens skip entirely, since it’s simultaneously the cheapest layer to add and the one most directly responsible for whether the actual work of cooking happens in good light or in your own shadow every single evening.